id like to note that i use a dutch GIMP, so sorry if i use any wrong terms. but since this is for people who know their way around GIMP already, this shouldnt be much of a problem for you guys

the reason why im making this tutorial is cuz ive been asked to explain how i made this a few times by now on a different forum. and since i have yet to make any sig tut contributions, why not make it here as well ^^
this is what ill be making:
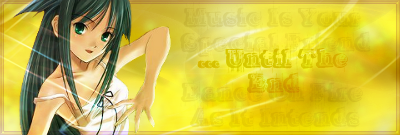
for those who have problems reading the text:
Music is your special friend
Dance on fire as it intends
... until the end
---
The Doors

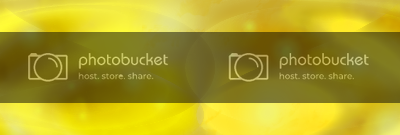
anyway, lets start with the background.
* Make a QBist pattern
Filters < Render < Pattern < Qbist
Click on one of the options you get until you see something you like. Go with something smooth and stuff. Click OK.
* Now to change the colour of it. I took a lot of steps to get where i wanted to -- a golden yellow BG.
If you're not interested in taking a lot of steps, here is what you usually do:
- Duplicate your layer
Layer < Duplicate Layer
-Make a Gradient Map
Choose two colours or a Gradient (i went with the Golden, f.e.).
Colours < Maps < Gradient Maps
-Play around with layer settings. Colour or Hue work best, usually
If you dont care for those few extra layers, here is what i did:
-Duplicate Layer
-Gradient Map (Yellow-Orange gradient option)
Set that layer to screen 100%
-New from visible:
Layer < New from visible
-Mirror the new layer horizontally and set it to Grain Extract (if thats the proper term)
-New from visible again
-Gradient Map again (Golden)
Set it to Hue 100%
-New from visible again
Set it to Hard Light 100%
-To get rid of any and all rough edges to the image, do a Gaus. Blur
Filters < Blur < Gaus. Blur
Set it to Lighten or Darken Only 100%
Now, to break the smoothness just a little:
-New Layer
-Use a few Smudge Effect brushes on Black
Soft Light 40%
-New layer -- Again Smudge Effect brushes, but on Yellow.
Grain Merge 30%
-New Layer -- same brushes, same colour, different place
Multiply 30%
Almost done now with the BG:
-On a new layer, place a few Spark Brush spots (The bright yellow brush with random sizes)
-Duplicate it
-Desaturate the original, and colorify the second to a very bright yellow.
First one on 40% - second on Hue 100%
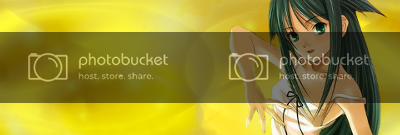
Okay, so far for the BG. Now lets move on to the Image youll put on it
-So you have your clean, cut-out render. Paste it as a new layer.
Right-click image < Paste as < New layer
-Resize it and place it somewhere you like (preferably on one of the four focal points. iow, somewhere close to either one of the corners).
Now we'll make it blend a bit better with the background.
-Duplicate it till you have 4 layers of the image
-First on Hard Light, second on Grain Merge, third on Screen, fourth on Normal
60% - 60% - 60% and the last between 70 and 90%
(yes, i realise its on the opposite side of the result. happens when you fiddle too much and realise you like it better on the other side)
Now for the flowing sparkles
Take your Splatter Brushes. See the little slide bar under your brush list? slide it till you get around and about 84. youll need this for what we'll do next to work decently:
Click on your Pencil button in your Toolbox. On the screen with Toolbox Options, below theres the option "use colour from gradient". Check that option and choose the Rainbow Pastels gradient.
Start creating a flowing line with several of your brushes on that same spacing of +/- 84. Youll see that, as you brush, the colours change. Theyre all colour from the Pastels. Handy, no?
Anyway, create your flow, and erase parts you dont like.
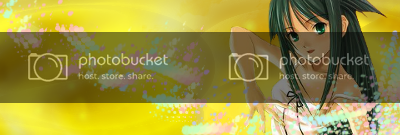
now, this isnt quite right yet. so lets fool around with that Splatter Layer to make it glowy:
So you have your layer. Duplicate it twice
-On the original one, you put a Gaus. Blur. Around and about 15 seems right. Do the same with the duplicates, but at 20 and 55. Then copy the duplicate (with the lower GBlur).
Play around with the opacity of each layer until you find something you like. You may or may not want to make more duplicates of any layer to get some nice sparkly shine.
-To give it the flow it needs, use some Odysee brushes. these have nice lines that are perfect for adding flow (and the straighter ones are great for rays of light, as well).
So get yourself a pastel-like blue colour. Create some flow with the brushes and set the layer to Grain Merge.
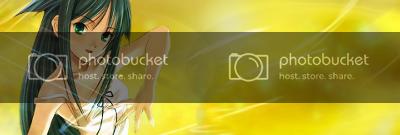
(yeah, this is where i mirrored my image. looks better on the left, doesnt it?)
As you can see, were almost done now
So, to finish it up, just add a nice border.
-New Layer
-Select your border
Select all (ctrl A) < Select < Edge < Enter size (3 pixels)
-Select your gradient option. I went with Flare Glow Radial 1
In your options window, click on your Shape option and set it to Shape (corners) .... or something like that.
Now just click your mouse and youre done

Set the layer to Multiply 100%
Enter your text and your done!
(please give feedback to my image and tutorial. its the first full sig tutorial ive done and was kinda unsure about it all xD)


