Good day, class!
Welcome to another GIMP animation tutorial, brought to you by yours truly, fencepost! This tutorial is dedicated to Kenny, who really expressed an interest in the signature I made resembling the one below, which is what we will be making today.
Before you start this tutorial, you'll need to have GAP (the GIMP Animation Package) installed on your machine. We're not going to use GAP in the fashion many of you may be accustomed to; however, GAP does add a very important filter, called Filter All Layers, which will be of big use in this tutorial, as well as your other graphics creations. You'll see how important it is in just a minute.
If you need to download GAP, Windows users can get it here:
Windows GIMP Animation Package and Linux users can get it here:
Linux GIMP Animation Package. Sorry Mac users, there is no GAP for you. :'( Windows users can just unzip the file and double-click the executable file to install. Linux users.....well, you'll know what to do. I haven't a clue.
Some of the images have been resized by the board. To see them full-size, right click on them and choose View ImageStep 1:Open a new GIMP document (I'm using a 300 X 150 image). Background color does not matter.
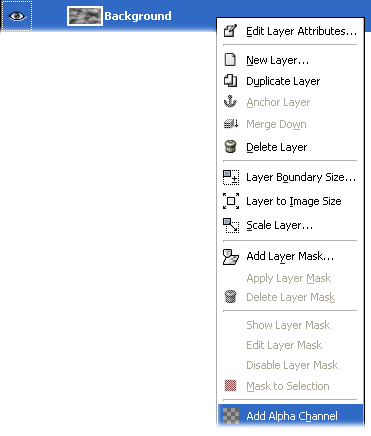
Step 2:Look at the name of your background layer. If it is in bold letters, right click on the layer name and choose Add Alpha Channel as shown in the image below. In a minute, we will be utilizing the Map Object Plugin, which requires all layers to have an alpha channel (or the ability to be transparent). By doing this to the background layer, we insure that the plugin will work properly.
 Step 3:
Now, we need to create a texture that is tilable or seamless so that it appears to flow smoothly when set into motion. An easy way to do that is to go to the Filters Menu > Renders > Clouds > Solid Noise...

and set your parameters like so:
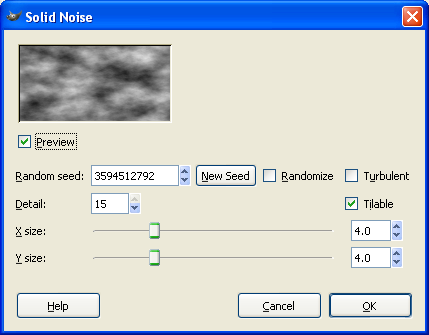
You don't have to use the same Random Seed, Detail, X/Y values that I did; However, you DO need to check the TILABLE box! Very Important.
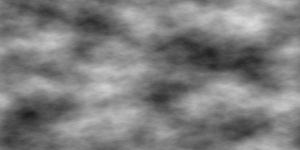
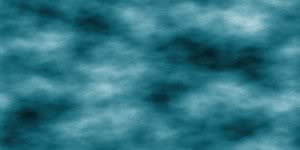
Here's my results. This texture is completely seamless. Later, you won't be able to tell where it begins or ends.
 Step 4:
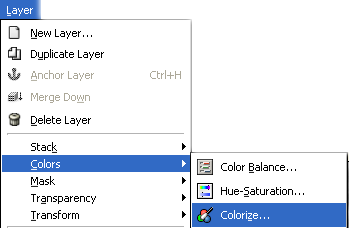
Now, let's add some color. I'm going to use the Colorize tool under the Layer Menu > Colors > Colorize...
and set my parameters like so:
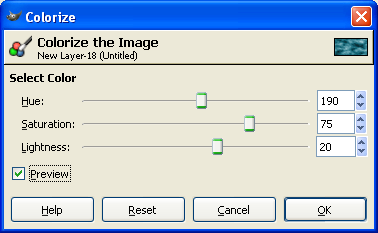
You can use any coloring method and settings as you desire. In fact, I encourage you to experiment.
Here's my results:
 Step 5:
Now, we need to determine how many pixels our layers should move from top to bottom. Well, for this animation, I decided that I wanted 10 layers. Since our image is 150 and pixels high, we need each layer to move 15 pixels to complete on full revolution. (150 pixels high divided by 10 layers equals 15 pixels). This is a good formula for you to use for your animations.
Step 6:Now, duplicate this layer by clicking on the Duplicate Layer button

at the bottom of the layer dialog menu.
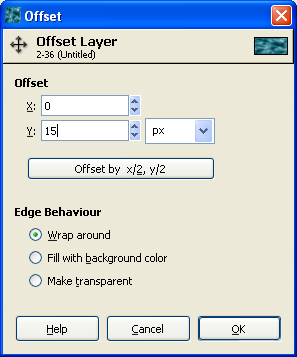
Step 7:On the duplicate layer, go to the Layer Menu > Transform > Offset... (Or Shift+Ctrl+O, much faster
IMO)
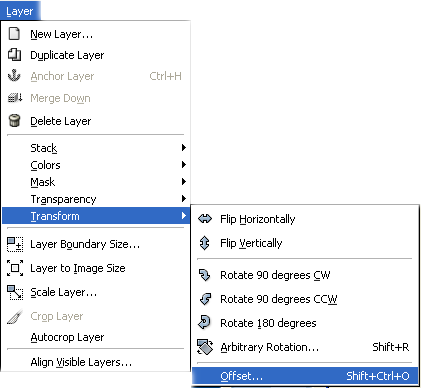
When the window open up, change the Y value to 15 (this is the number of frames that our layers will move each time). Also, make sure you check the Wrap Around button under Edge Behaviour. This causes the layer to wrap around on itself. Click OK.
 Step 8:
Repeat Steps 6 and 7 until you have 10 layers. However, the layer you'll be making a duplicate of is the one you just offset. Don't make a duplicate of the background layer everytime or all layers will be the same. For example, after you completed Steps 6 and 7 the very first time, you're left with two layers (the original and a moved duplicate). Make a duplicate of the 'moved duplicate' and then move that one. Got it?
Once you have your 10 layers, test out the animation to make sure you offset the animation properly. Go to Filters > Animation > Playback. If the animation moves seamlessly, proceed to the next step. If not, you need to go back and correct your mistakes.
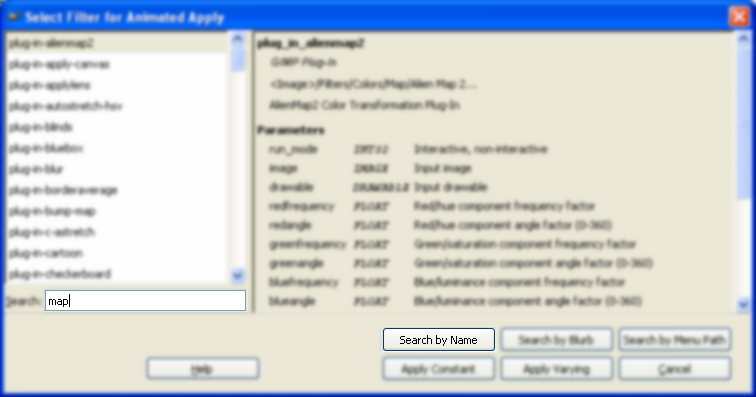
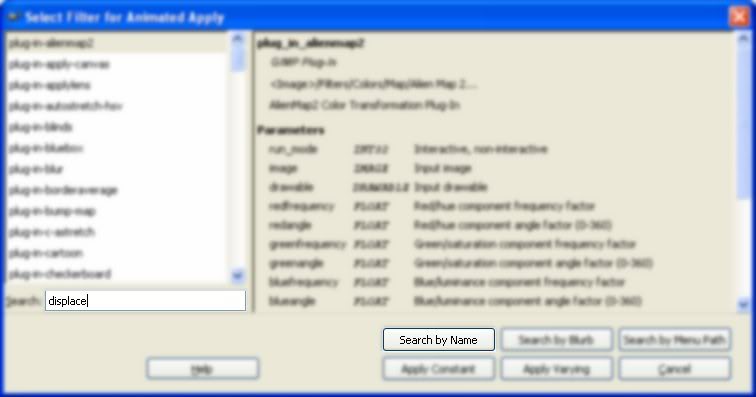
Step 9:Here's where the fun begin! Go to the Filters Menu > Filter All Layers...

When the Filter All Layers dialog window appears, type 'map' in the check box as indicated and click 'Search by Name'
When the next window opens,
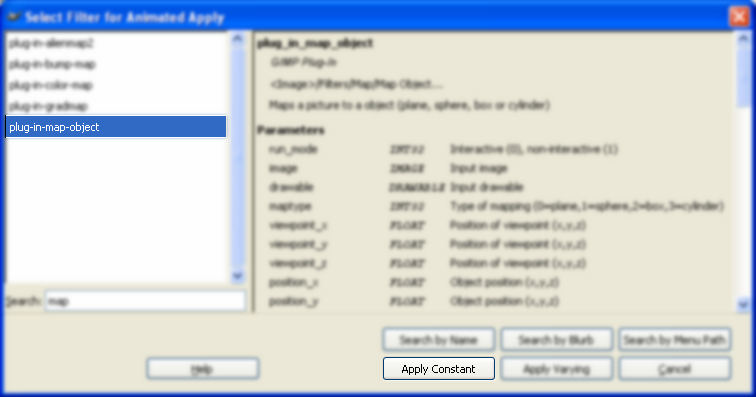
Click on the map-object plugin as highlighted and choose the 'Apply Constant' button. We're gonna rotate each one of these layers to the same (Constant) value.
Step 10:
When the Map to Object dialog window opens, set the parameters for each tab as indicated. Don't worry about the Material tab.
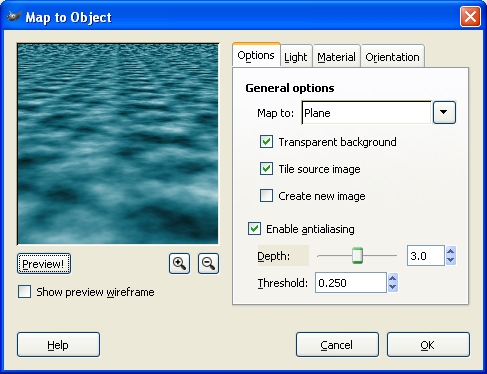
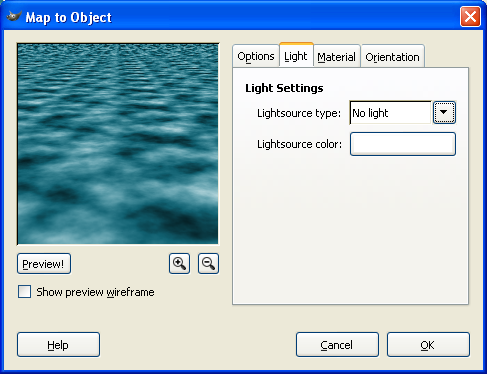
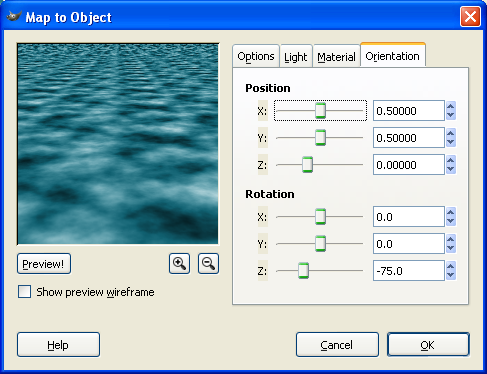
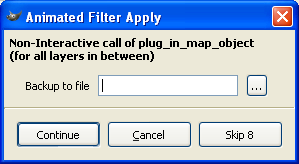
When you have changed the parameters as shown, click OK. GIMP will churn for a moment and then choose 'Continue' when this popup appears:
GIMP will then rotate all the layers in the stack to -75 along the Z axis. When it finishes doing that, proceed to Step 11.
Step 11:If you look at the top of your image, you'll notice that it's very grainy in appearance. It's especially noticeable if you go to the Filters Menu > Animation > Playback...
Let's get rid of some of that noise by grabbing the rectangular selection tool and selecting a portion to crop out.
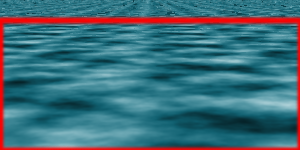
In the image above, I selected an area 130 pixels high. It really doesn't matter how much you select and crop becuase our layers are seamless and will appear to move like flowing water regardless of how much we remove.
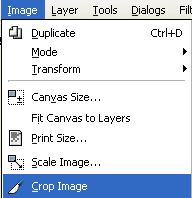
Once you have your selection, go to Image Menu > Crop Image
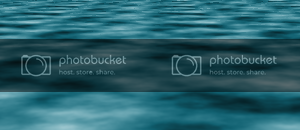
Here's my results:
 Step 12:
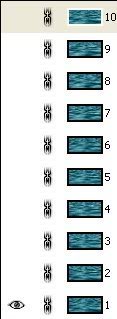
Now, let's change the perspective of out layers a bit. To do this in one step, do a Shift+Click on the 'Chain' next to any of the layers and all the layers will be linked as shown.
Next, give yourself a bit of room to work with by hovering over one corner of the image window until your cursor turns into a two-headed diagonal arrow. Then, click and drag.
Now, get the Transform button

and click on the image with your cursor. The following window may appear over your image. If it does just drag it out of the way for just a second.
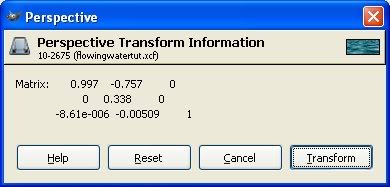
Click on your image and stretch out that bottom anchors similar to that shown below. It doesn't have to be exact. We're just adding some depth to our water.
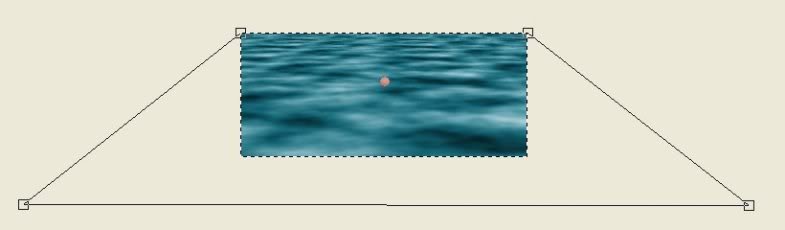
When you have it the way you want, click the Transform or Enter button to complete the perspective change.
Step 13:After running the Perspective Change, your top layer may not be anchored. Look in your layer dialog window and if the top layer is floating as shown below,

click on the Anchor Layer button

to anchor it to the top layer.
Your resulting image should now look like this:
 Step 14:
Since we've stretched our layers, we need to make them fit to the image boundaries in order for the image to be saved as an animation.
To do that, click on any one of the layers and go to Select Menu > All (Ctrl+A)
Then go to Image Menu > Crop Image
Now, go to Select Menu > None to clear the selection
Step 15:Now, let's add a little more depth to our water. Go back to the Filters Menu > Filter All Layers....
Set your settings like so...
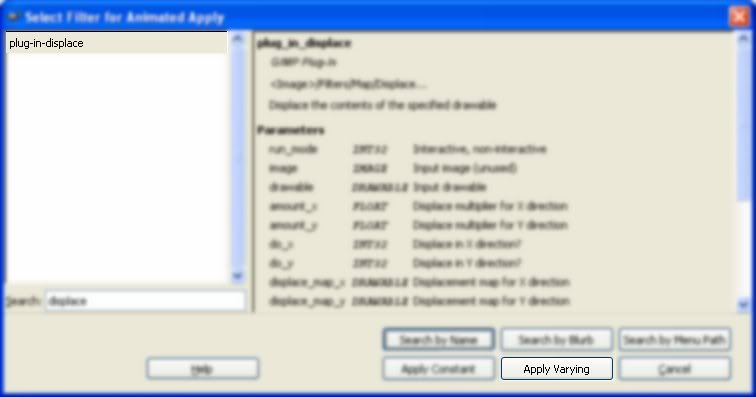
This time we will be running the filter twice with variable settings.
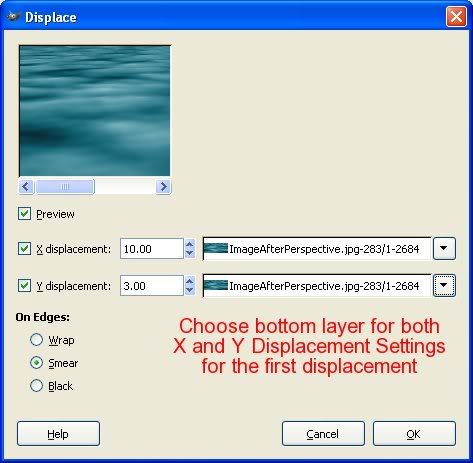
When the first displace dialog appears, set your settings as shown. Make sure you choose the
bottom layer for the first run of the plugin:
Choose OK
When this popup appears, choose 'Continue'
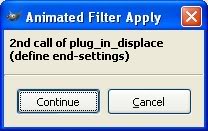
When the displace filter appears again, we are going to give it the setting to displace the top layer with itself. Then the Filter All Layers plugin will know to displace each layer with itself with the defined X and Y displacement settings.
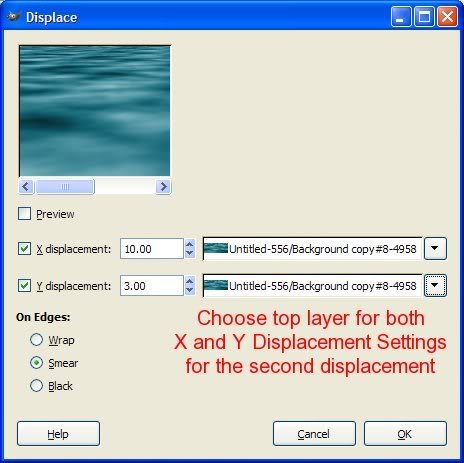
Click 'Continue' when the following window appears:
 Step 16:
Now, go to Filters > Animation > Playback... and review your wonderful creation!
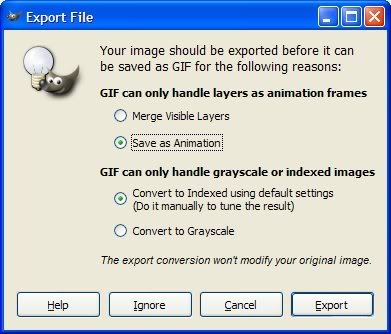
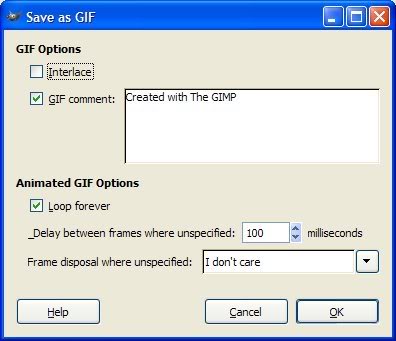
Step 17:Then go to File > Save or Save As....and give it a name with a .gif extension.
Enter the following settings as the windows appear:
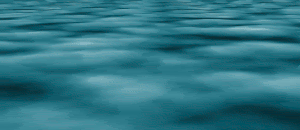
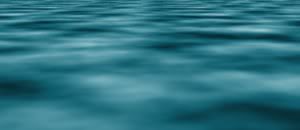
Your resulting animation should look like so:
How'd you do? I hope you enjoyed this lesson and learned a few new tricks along the way! Make sure you show me your results!
Take care and happy GIMPing!
Art


