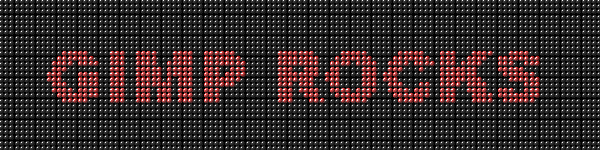
In this tutorial, I will show you how to create a digital marquee, like the one shown below:
This tutorial will require the use of my Move Layer script for GIMP:
FP's Move Layer Script This tutorial was created using GIMP 2.6.6.
I also recommend you install these scripts:
Saulgoode'shttp://www.flashingtwelve.brickfilms.com/GIMP/Scripts/combine-bg.scmhttp://www.flashingtwelve.brickfilms.com/GIMP/Scripts/anim-settings.scmInsanity Prevailshttp://insanity-prevails.deviantart.com/art/Multi-Layer-Action-Scripts-72632286Double-click the zip file and place the script in your GIMP scripts folder (ie...C:\Program Files\GIMP-2.0\share\gimp\2.0\scripts). Refresh your scripts and you're ready to go. The script can be located under the Filters > Animation > Move Layer...
The tutorial is not difficult at all, I've just included a LOT of screenshots to minimize confusion. Let's begin....
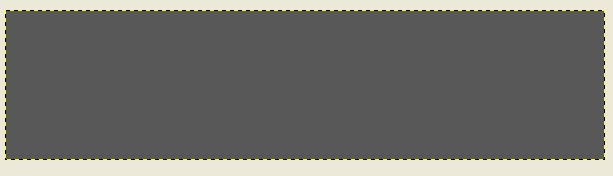
Step 1 - Create background layerOpen up GIMP and create a new background layer (Mine is 600X 150). Set your foreground color by clicking on the foreground color swatch:

and choose something close to black (I don't recommend complete black as it doesn't quite come out right when using the GIMPressionist filter.) I used color 585858 (or R 88, G 88, B 88).
Fill the background layer with this color. Here's what mine looks like:
 Step 2 - Create text layer
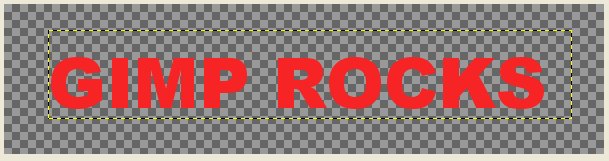
Select your text tool and add your text with the desired color. I recommend you use a 'thick' font (I went with Arial Heavy at size 70).
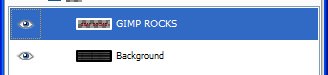
You should now have two layers in the stack:
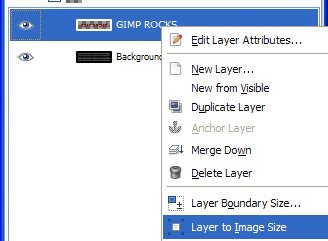
Right-click on the text layer and choose "Layer to Image Size"
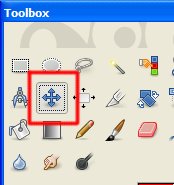
Center the text by clicking on the Move Tool (4-headed arrow) and move the layer as desired.
 Step 3 - Paint background
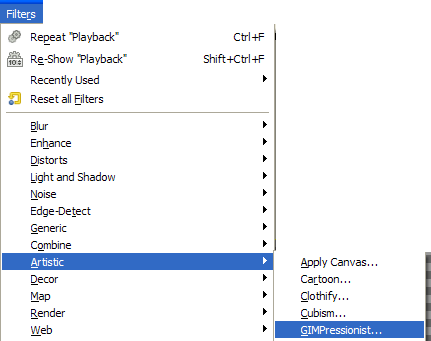
Make your background layer active by clicking on it in the Layers Dialog and then go to Filters > Artistic > GIMPressionist...
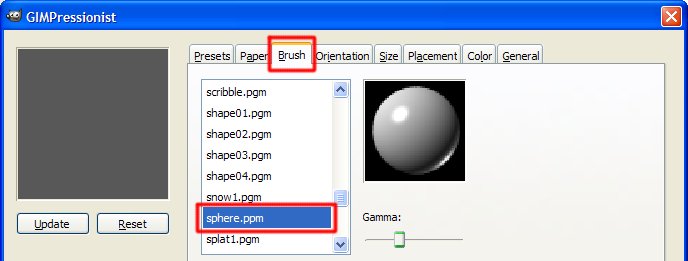
A dialog window will open up with several tabs. I'm gonna provide you with the settings I used; however, you may need to adjust them to fit your image size. Additionally, we won't be altering every tab. Just the ones we need to.
Under the Brush Tab, Choose Sphere:
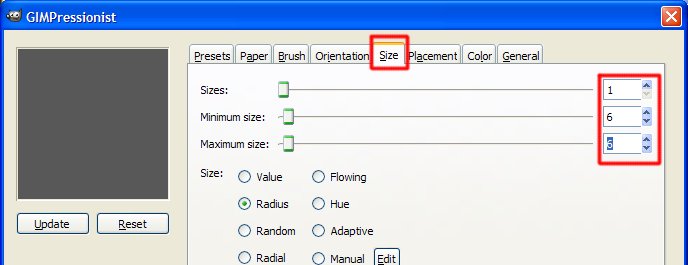
For the Size, choose a Size of 1 and Max/Min choose 6
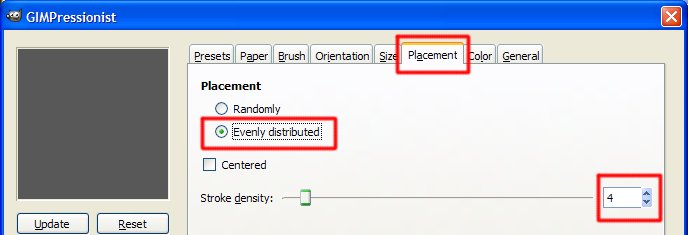
For the Placement Tab, Choose Evenly Distributed and for Stroke Density, choose 4
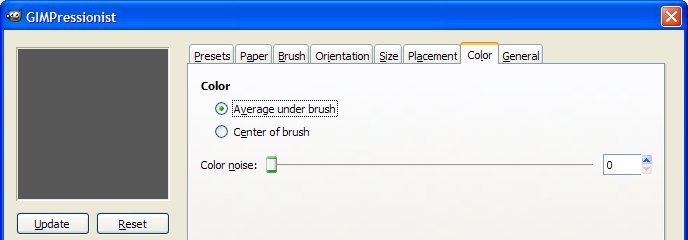
For the Color Tab, you can pick what you want. I chose Average under brush, since my layer is one color it doesn't matter. For a multi-color layer, you'll need to choose whatever suits you best.
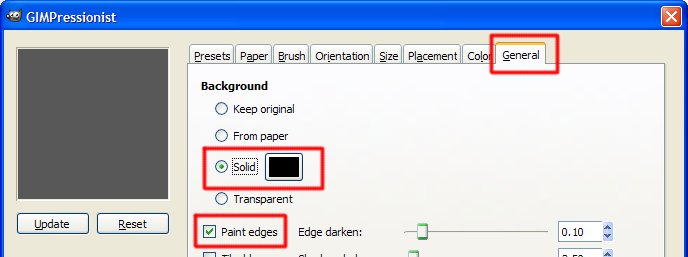
For the General Tab, I chose Solid and Black and Paint Edges.
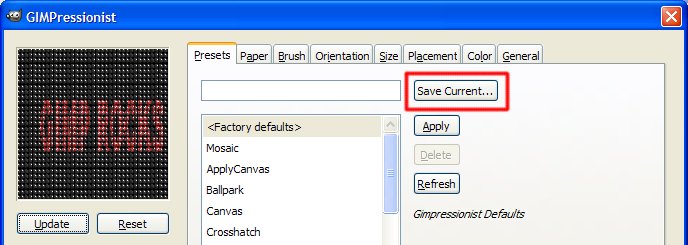
If you would like to save this preset for later use, Click on the Presets tab, give it a name in the box next to Save Current... and you can select the preset next time.
Now, choose OK at the bottom of the dialog to paint your background layer.
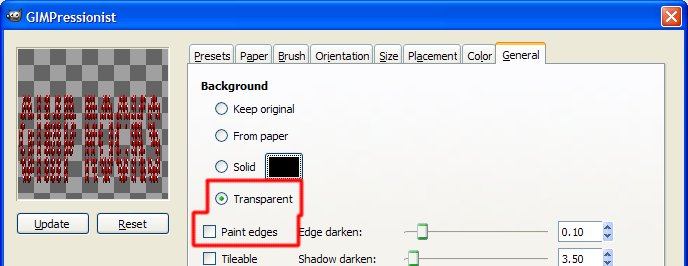
Step 4 - Paint the textDo the same thing for the text layer: Filters > Artistic > GIMPressionist... (or if it's the last filter you used, hit Shift+Ctrl+F). Since we just used this filter, all of the settings should still be there. But, if you closed down GIMP and didn't save the preset, you'll need to adjust the settings as described above. Otherwise, we will only change one the General Tab settings. Under the General Tab, choose Transparent and deselect the Paint Edges option.
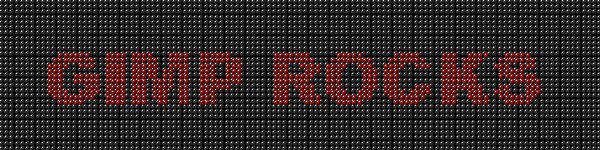
Click OK at the bottom of the dialog window. This is what we have now:
 Step 5 - Adjust text layer as needed
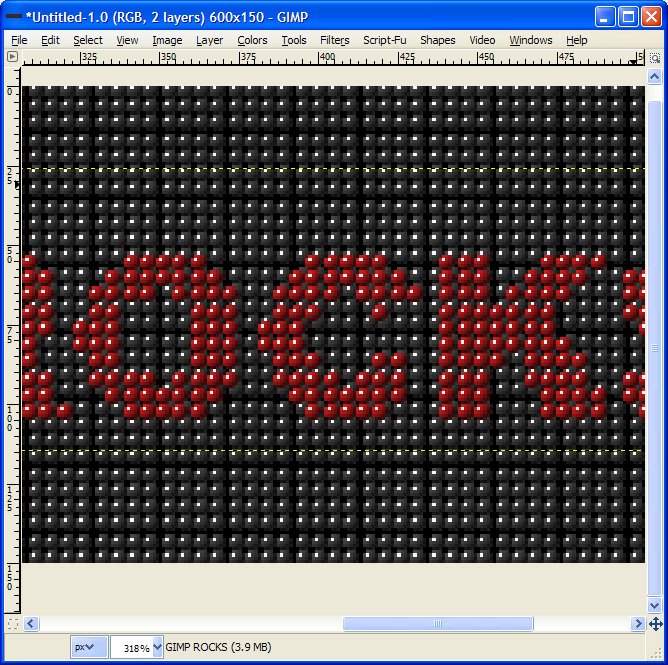
If you zoom in on the image, your layers may not be aligned correctly. Here's what mine looks like (Notice that the text "bubble" are slightly offset from the background layer "bubbles"):
This is easy to fix. Choose your Move Tool (4-headed arrow), click somewhere in the image to make the image active, and use your keyboard arrows to adjust the layer so both of them are aligned:
 Step 6 - Animation
Next, with your text layer still active, go to Filters > Animation > Move Layer... and choose these settings:
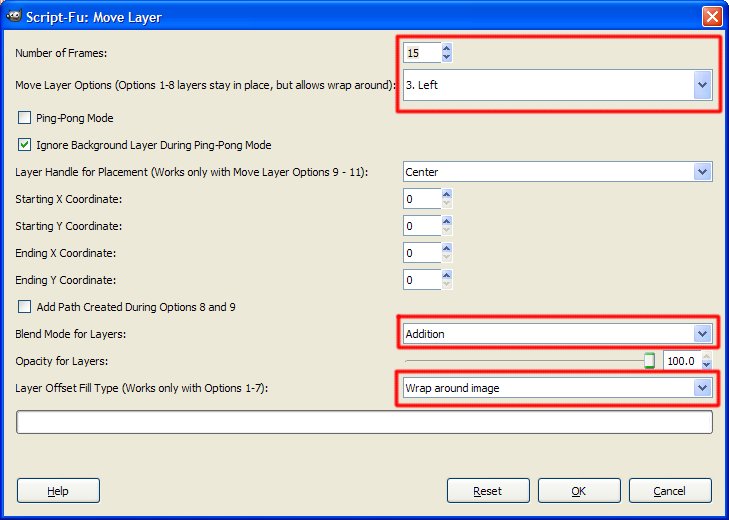
Hit OK and you'll have 15 text layers.
Step 7 - Combine the layers with the backgroundGo to Filters > Animation > Combine Background
When all of the layers are combined, you can delete the very bottom background layer as it is no longer needed.
Step 8 - Save your animationUsing the animation settings script listed at the top of the tutorial, you can quickly adjust the speed of the layers. I set my bottom layer to (1500 ms) to create a slight pause at the beginning of the animation. The remaining frames were set to (100 ms).
Go to File > Save or File > Save As... and save as animated gif.
Your results should look something like so:
Let me know if you have any questions. Enjoy!
Art


