This tutorial will show you how to create an animated route along a map and is based on the discussion in this topic:
Create Animated MapHere's the final image...
While these steps will only show how to add a single route to a map, you can add as many routes as you would like and even instruct the script to start on any layer or have any number of frames.
I'm using GIMP 2.6.6 for the tutorial.
You will need the following script installed to complete the tutorial -> Animated Path Stroking Script. Open the zip file and save the .scm file to your GIMP scripts folder (ie...C:\Program Files\GIMP-2.0\share\gimp\2.0\scripts). Refresh your scripts and you're ready to go.
It's probably a good idea to have the animation settings script installed on your computer so you can quickly adjust the timing of the layers.
That script can be download here-> saulgoode's animation settings scriptLet's begin.
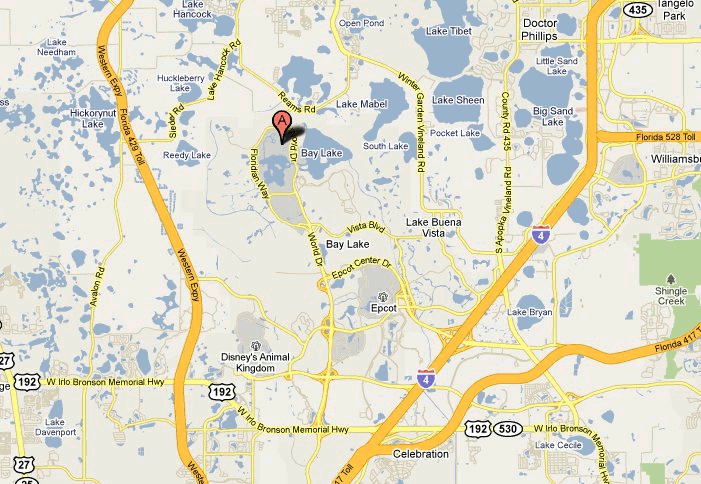
Step 1Open up your desired map in GIMP. I'm using one from Google that's near my house in Central Florida and I'll show you how to get to Disney World.
 Step 2
Create a duplicate of the map so you have two layers. Here's a screenshot of the layer dialog window....
 Step 3
Grab your path tool

and start creating your path on the image. Here's what my path looks like. I started near the green dot and finished at the red dot.
The path will be painted in the direction you draw it.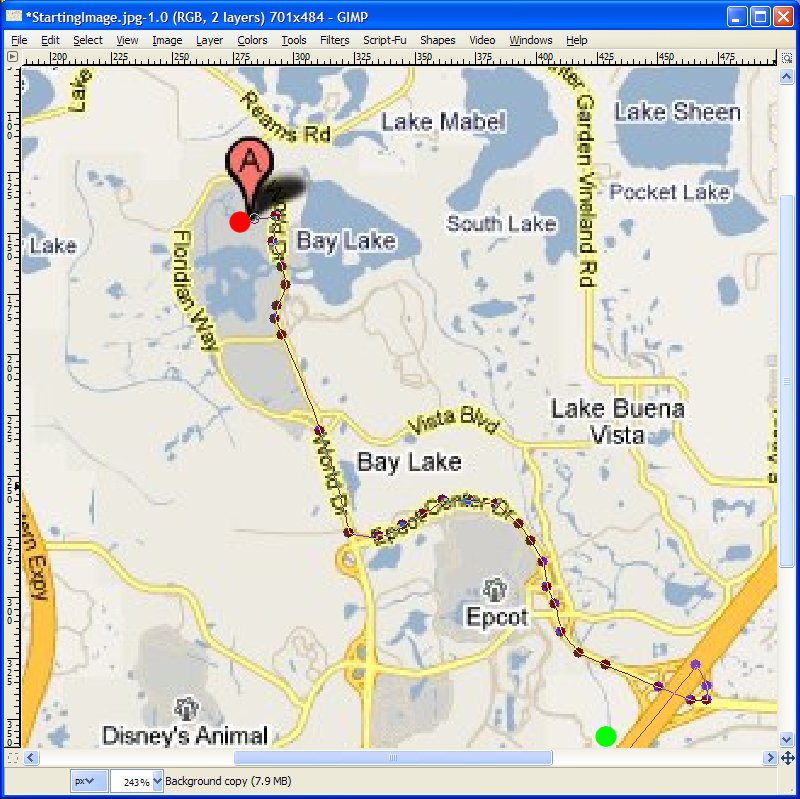 Step 4
With your path now drawn, make your top layer active by clicking on it in the layer dialog window...(It's highlighted in blue in my screenshot.)
This is the layer we will start drawing on. The bottom layer will be left untouched. Step 5
Choose the brush you want to paint with. I chose the Circle Fuzzy (07) and set the spacing to 1.0
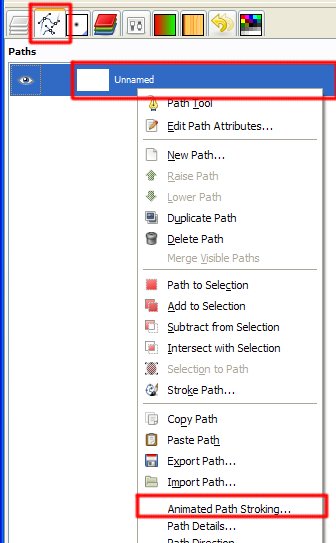
Step 6Click on the Paths Tab in GIMP and it will show the path dialog window and all of the paths you have for that image. Right now, we should only have one. Right-click on that path and choose Animated Path Stroking.
Here's the settings I picked...
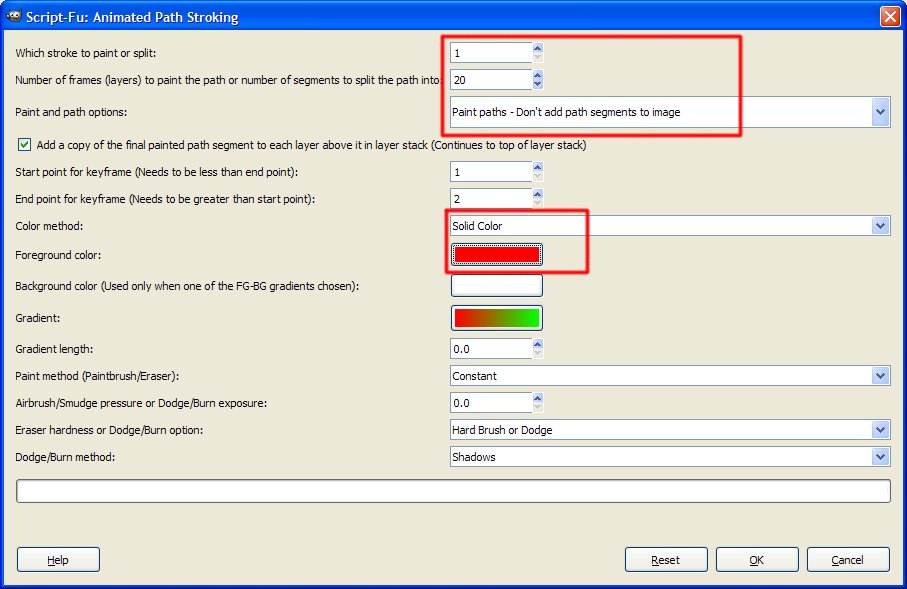
Click OK and script will do the rest and your animation should look something like so:
Step 7If you want to alter the speed of the layers, make sure you installed the Animation Settings script I recommended at the beginning of the tutorial and go to Filters > Animation > Settings... Under delay you set the timing. The larger the number the longer the delay. I picked 100 and set the mode to Replace. I then added a longer delay (1.5 seconds or 1500 ms) to my first and last frames. To do that, I double-clicked on the layer name changed the timing number to (1500ms), and then hit the <Enter> key.
Make sure you hit the <Enter> key so that GIMP will know to make the changes.That's it! Give it a shot and see what you come up with. Try adding more routes to the map, changing brush size, color and altering the number of frames they are drawn over. Don't be afraid to experiment with the settings. Undo is your friend!
Cheers!
Art
Posted on: February 12, 2010, 12:34:36 PM
Here's a 3-route version. Notice how they start at different times....


