In this tutorial, I will show you how to create two simple "highlight" animations such as these below:


While you may recall my other tutorials on this same subject (
Animated Flash Text in GIMP GAP) &
(
New and Improved Animated Highlight - without GAP), this tutorial will require the use of my Move Layer script for GIMP:
FP's Move Layer ScriptI also recommend you install these scripts:
Saulgoode'shttp://www.flashingtwelve.brickfilms.com/GIMP/Scripts/combine-bg.scmhttp://www.flashingtwelve.brickfilms.com/GIMP/Scripts/anim-settings.scmInsanity Prevailshttp://insanity-prevails.deviantart.com/art/Multi-Layer-Action-Scripts-726322861. Double-click the zip file and place the script in your GIMP scripts folder (ie...C:\Program Files\GIMP-2.0\share\gimp\2.0\scripts). Refresh your scripts and you're ready to go. The script can be located under the Filters > Animation > Move Layer...
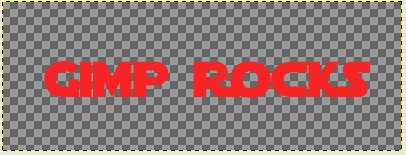
2. Using the Text tool, add some text to a layer in GIMP. Here's what I've done (the font I'm using is called Star Jedi and can be downloaded here:
http://www.dafont.com/star-jedi.font)
 3.
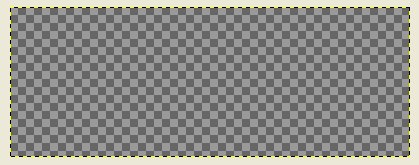
3. Now, that you've got your text, add a new, transparent layer above the text layer:
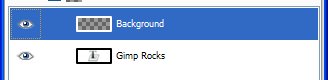
Your layers should look like this (disregard that my transparent layer is called "Background". The text layer is actually the background):
 4.
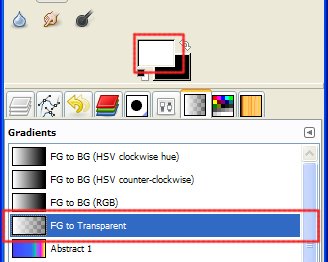
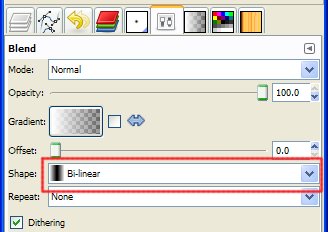
4. Set your foreground color to white and under the gradients tab, choose FG to Transparent, like so:
 5.
5. Next, set the Blend mode for the gradient to Bi-linear.
 6.
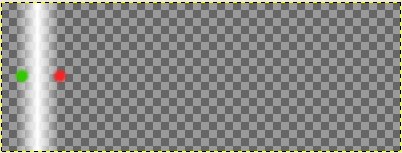
6. Using the gradient tool, place it on the transparent layer (somewhere near the green dot on my image) and, while holding down the Ctrl key (restricts the tool to a straight line), drag the tool to somewhere near the red dot. (This is our highlight layer). Note: the red and green dots will not be on your image. They are guides only.
 7.
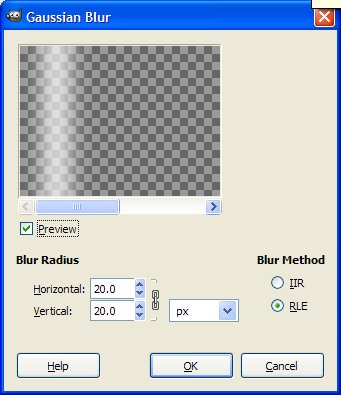
7. Now, let's blur this layer a little bit. Go to Filters > Blur > Gaussian Blur... Here's what I set mine to:
 8.
8. Now, let's make some magic! Go to Filters > Animation > Move Layer... and the following dialog will appear:
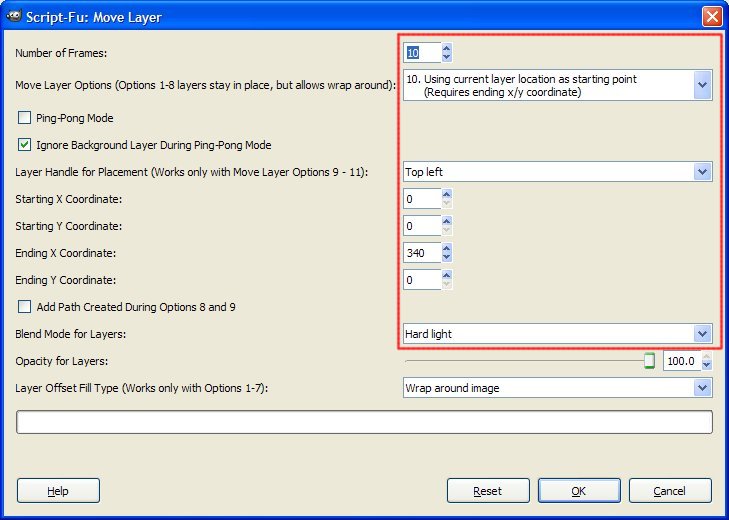
I won't cover all the possible options at this point (just the ones to make these animations).
A. Set you number of frames (I chose 10)
B. Under Move Layer Options, I chose Option 10 (Using current layer location as starting point). Using this setting, GIMP will automatically determine the layer's starting point and use it. You could choose another option, but humor me for the moment and follow along!

 C.
C. For Layer Handle Placement, I chose Top left. I don't need GIMP to make any adjustments to where the layer is positioned as it will work fine with the Top left setting. However, I included some other options in the script for you to experiment with.
D. Since we're using Option 10 for the Move Layer Options, we don't need a starting X/Y coordinate. However, we do need to tell GIMP where the layer should stop. I figure that the left side of my layer will need to stop around the 340 X-coordinate. Since we're moving only horizontally, we leave the Y-coordinate at 0.
E. I've set the blend mode for the layer to Hard Light. Feel free to experiment with the blend modes/opacity settings.
This is all we need to set for the animation to work. Click OKGIMP should add several layers to image. To finalize it for an animation, go to Filters > Animation > Combine Background (this is one of the scripts I recommended at the beginning). It will add a copy of each highlight layer to the background layer. In this case, the background layer is the text layer.
Once you've done that, delete your bottom background layer (this layer is no longer need). If you've done everything as I've stated, you should have a basic highlight animation. For giggles, I added a new background layer, filled it with black, and ran the Combine Background script again (deleting my black background layer after running the script) and I have this:
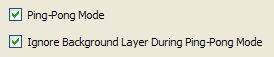
9.To complete the ping pong animation as shown above, in the move layer dialog, choose these settings:
Then, redo these steps:
GIMP should add several layers to image. To finalize it for an animation, go to Filters > Animation > Combine Background (this is one of the scripts I recommended at the beginning). It will add a copy of each highlight layer to the background layer. In this case, the background layer is the text layer.
Your animation should look something like so:
You can view your animation under Filters > Animation > Playback...
Save as an animated gif and you're ready to share it with the world! Enjoy! Let me know if you have any questions or encounter any problems.
Art


